Softerra LDAP Administrator 2009.2 - What's New?
Softerra LDAP Administrator 2009.2 is a major release that offers several new features, improvements and user interface refinements.
Below are the highlights of the major feature additions and changes in Softerra LDAP Administrator 2009.2 from the previous version, Softerra LDAP Administrator 2009.1.
LDIF Editor
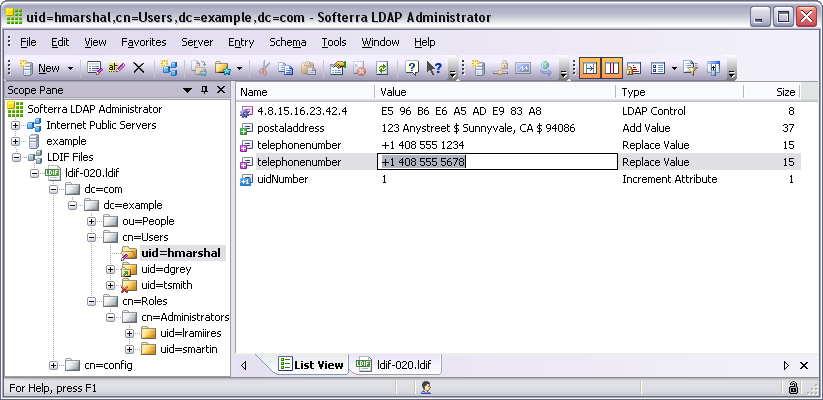
LDIF Editor - the main feature introduced in this release - is a text editor for LDIF files. With this tool, you can now use LDAP Administrator to create, view and edit LDIF documents. LDIF Editor fully supports RFC2849 and RFC4525 and has many helpful features such as syntax coloring based on the LDIF format, outlining, IntelliSense, etc. introduced to simplify the process of viewing and editing of LDIF files. LDIF Editor also enables you to display a tree structure of the LDAP entries and modifications contained in the LDIF document.
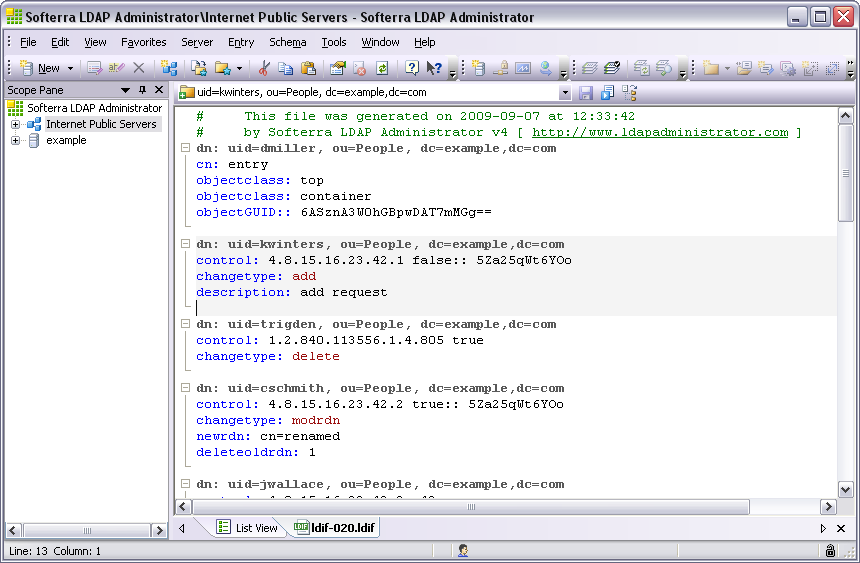
Syntax Highlighting
 In order to make the reading of LDIF documents an easy process, LDIF Editor supports LDIF-based syntax coloring. A unique color is assigned to each logical element of LDIF documents. However, LDIF Editor allows to customize color schema the way you like.
IntelliSense
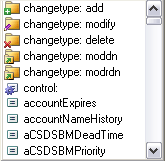 To accelerate typing LDIF documents, LDIF Editor provides you with the auto-completion and value auto-generation capabilities such as IntelliSense.IntelliSense detects what part of LDIF document is editing and suggests you with a list of possible LDIF keywords, attribute names, attribute values and other LDIF templates that can be inserted into the document.
 It also lets you automatically generate GUID values and insert them into LDIF Editor in the Base64 encoding.
Text Outlining
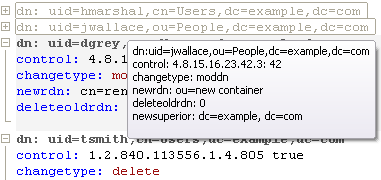 To increase readability and simplify work especially with large LDIF documents that contain lots of records, we have introduced the Outlining feature. This feature allows you to collapse LDIF records to a single line, which makes viewing and navigating through the document significantly easier. The hidden records can be displayed back at any time.
Navigation
 LDIF Editor allows you to quickly locate an LDAP entry or a set of changes made to an LDAP entry by its DN. The editor is furnished with the Navigation control that contains a list of entry DNs described in the current document. With this control, you can navigate to any entry of the document by selecting the respective item from the list. The list also can be filtered by entering the filter criteria in the edit box of the Navigation control.
Printing
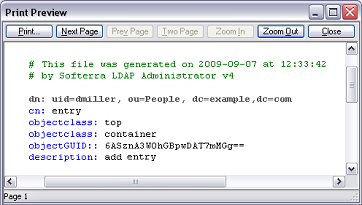 LDAP Administrator allows you to print LDIF documents as they are displayed on the screen with syntax coloring remaining. You can also configure printing settings like page format, margins and other print parameters to modify the look of the printed document and use Print Preview to check how the printed document will look.
BASE64 support
 Binary data such as JPEG images are represented in LDIF using the Base64 encoding. LDIF editor allows you to use Binary Editor to edit such data and insert them back to the document in the Base64-encoding.
Editing Passwords
 For editing of LDAP attribute values used to store passwords LDIF Editor provides you with Password Editor. It will help you create or change passwords and store them in LDIF documents in the required format.
LDIF Tree View
This feature is the second functional part of LDIF Editor that allows you to represent LDIF documents in form of a DIT (Directory Information Tree) as if they are physically located on the server. This view shows the hierarchical structure of LDIF documents, which can be very convenient for browsing LDIF documents. Using LDIF Tree View, you can also edit an LDIF document as you usually do when working with a regular LDAP server.
Quick Search Enhancements
Several improvements have been made in the Quick Search tool:
- From now on, you can use quick search results to delete the corresponding entries from the LDAP server.
- Search results can now be added to the basket, where different operations like Export Data, Multiple Modification, Delete, etc. can be executed on them.
Printing Support
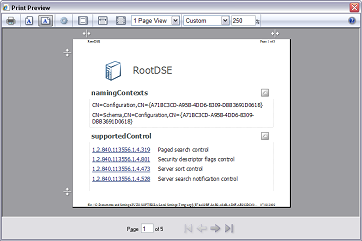 We have added to the LDAP Administrator the functionality to print the content from HTML View and LDIF Editor document. Page format, margins and other print parameters can now be adjusted manually to modify the look of the printed document. The application also provides the Print Preview to see the layout of the printed document.
Clean Auto-Saved Data
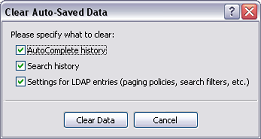 As you work with LDAP Administrator, it automatically stores your settings, preferences, filters, different search parameters, servers you use, and other information. This information is stored to improve your work by giving you the possibility to see what data you’ve used before and use these data again. But sometimes you may want to delete this information or reset settings you’ve made. Starting from this release, you can clean such automatically saved data using the Clear Auto-Saved Data dialog.
Miscellaneous
- Modern LDAP server support: Various compatibility issues have been addressed to support modern LDAP servers such as Active Directory 2008 R2 and UnboundID.
- Windows 7 support: Windows 7 and Windows Server 2008 R2 is now fully supported.
- Password validation: The validation of the entered password for authenticating on LDAP server has been enhanced. Now passwords get validated immediately after entering: if you made an error, you will be notified about that and prompted to re-enter the password.